Making soap at home can be a fun and rewarding hobby. It is fun because there are so many ways to customize a bar of soap. From different shapes, colors, designs, and ingredients, it is incredibly simple to make a unique bar, and the whole family can get involved.
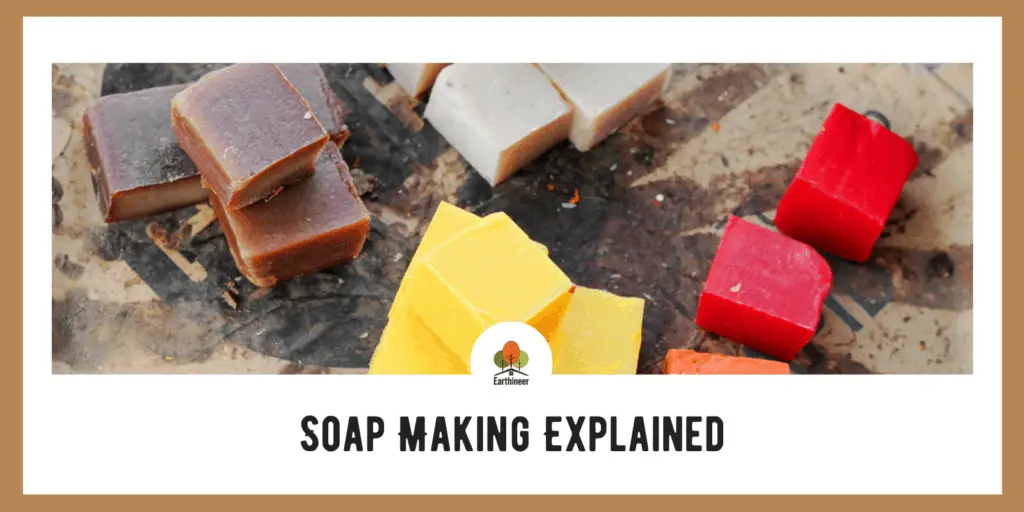
It is rewarding because it allows you to have complete control of what goes into your soap. This will help you to get away from mass-produced soaps that may have harmful chemicals in them. These can be harsh on the skin but with homemade soap, you can make the perfect bar for yourself.
A few years ago, my wife decided to start making soap for our family and so she dove right into researching everything about it. At first, my head spun a little bit when she would talk about it, but it did not take me long to catch on.
The first thing that she had to decide on was which process she wanted to use. There are several different ways in which to make soap but the most popular seem to be, cold process, hot process and melt and pour.
If you want to completely make soap from scratch then the cold and hot processes are the way to go, although they are more involved and require more of your time.
If you just want to try your hand at it and do not want to invest a lot of time or money into the project, then I would suggest starting with melt and pour. But I am getting a little ahead of myself.
Definitions
Here are a few common terms you may hear or see when researching soap recipes and methods.
Saponification
This is the process that occurs when fats and oils, are converted into soap through the heat in the presence of sodium hydroxide.
Trace
When the oils, lye, and water are emulsified.
Gel Phase
During this stage, the soap will take on a gel-like appearance and the soap’s temperature can rise above one hundred and fifty degrees.
What You Will Need
The tools and ingredients that you will need will depend in part on which process you choose to do but some tools can be used across all three processes.
- Molds
- Mixing bowls that are microwavable or heat-safe
- Microwave
- Double boiler
- Slow cooker
- Stirring utensils
- Scents
- Thermometer
- Essential oils
- Coloring
- Premade soap base
- Lye
- Oils
- Wax paper
- Large knife or soap cutter
- Rubber gloves
- Safety goggles
- Mask
- Scale
Saponification
To understand saponification is to understand how soap is made. I do not think it is necessary to get into the nitty-gritty of the chemistry as a basic knowledge of the process is enough.
All this process requires is a careful combination of fats, oils, and lye. When this occurs, a reaction takes place that gives off heat which is known as an exothermic reaction and the fatty acids are converted into glycerol.
This is a simplified explanation of the steps involved, but this the process for making soap. Once ingredients have gone through this you will have soap.
Anything else that is done to the bar, such as adding color, essential oils, scents, or other ingredients, is simply personalizing the bar for you.
Hot and Cold Process
These two processes are different, but they do share some similarities. Both require that lye be prepared, and they use a source of oils.
Lye is highly corrosive so there are a few safety precautions that need to be taken. You are going to want a pair of rubber gloves, safety goggles, and possibly a face mask. Wear clothes that cover up as much of your skin as possible which means long-sleeved shirts, pants, and shoes.
Lastly, you are going to want to work in a well-ventilated area to reduce the risk of any hazardous fumes.
Cold Process
This process entails putting the lye water and oil mixtures into separate containers where they will become hot on their own. They need to be allowed to cool down to a certain temperature before they can be mixed.
At this point, the lye and oils are mixed until it reaches a certain level of trace, more ingredients are then added, and mixing continues.
Once everything is combined and poured, the mixture needs to stay in the mold for twenty-four to forty-eight hours while saponification happens.
After the bars are removed, they will need an additional four to six weeks before they can be used. This extra curing time allows for excess water to evaporate which results in a harder, longer-lasting bar.
Hot Process
The difference with the hot process is that the mixture is heated in a slow cooker. This slow heating process helps the ingredients go through saponification more quickly.
A few other differences are that the hot process produces a soap that is not as polished as other methods. It is quite lumpy and has an “older” look to it. Because of this appearance and consistency, it can be difficult to add color swirls or other designs.
A hot process bar of soap can be used as soon as the bar has cooled and hardened but if you allow it a week or two to cure further, the bar will become harder and last longer.
Melt and Pour
Melt and pour is by far the easiest way to make soap at home. This is because the soap base is purchased premade and comes in a large block that is ready to use.
For this reason, some people view melt and pour as not really making your own soap because the soap base has already been made.
There are a variety of different soap bases available and which one to use depends on what you want your soap to look like and your preferences towards ingredients.
Goats Milk, shea butter, cocoa butter, honey, and glycerin are just a few soap bases available.
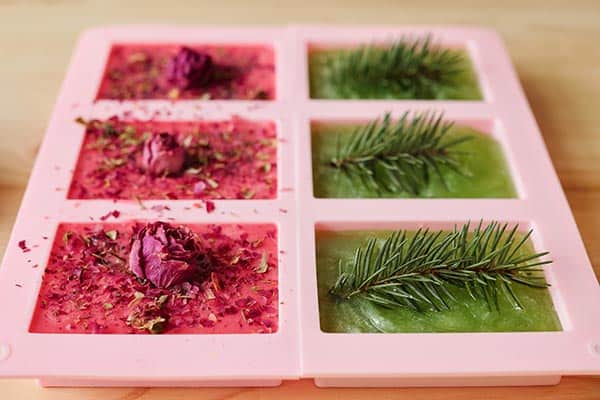
Glycerin soap base can be a lot of fun to work with because it is clear. Items that are added to it will be highly visible, such as flower parts or a small toy for children soap.
What is so easy about melt and pour is that the soap base is already made. So, it only needs to be melted and poured into a mold, hence the name. Here is a rundown of the steps for making this type of soap.
Step 1
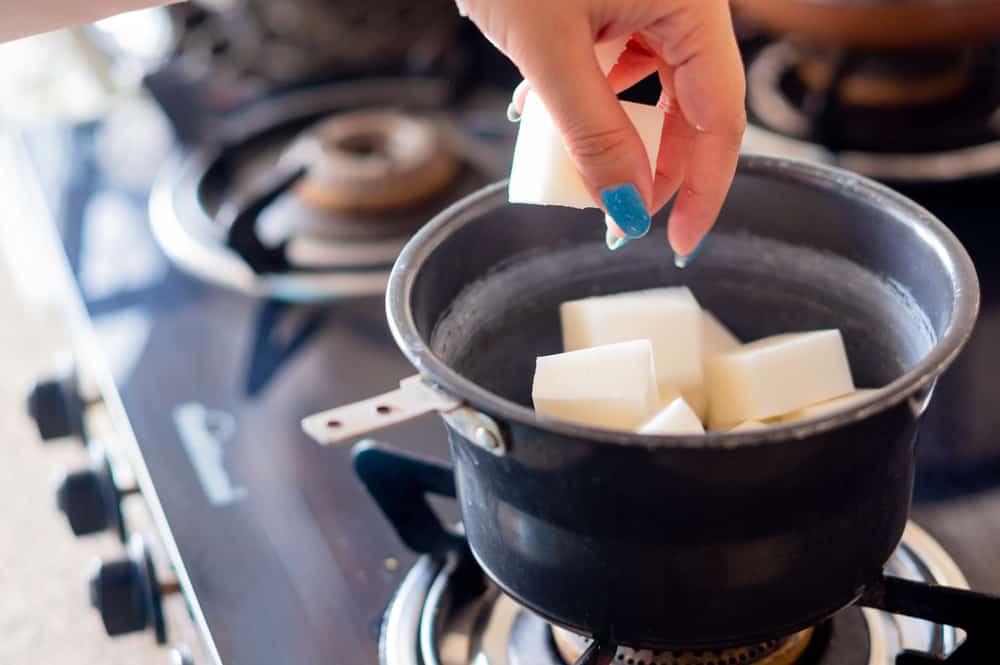
Using a sharp tool, cut the soap base block into small cubes, think of the size of cheese blocks on a party tray.
Step2
Next, put the cubes into a bowl and melt. This can be done by heating the cubes in a microwave or a double boiler. When using a microwave, heat in short increments of thirty seconds or less and stir in between increments until the base is evenly melted.
A double boiler is nothing more than a pan of boiling water with a heat-safe container sitting on top of it. As the water continues to boil, the steam will rise and gently heat the container on top.
As with most projects, patience is the key. This is especially important when melting the soap base because it is extremely easy to burn.
I have tried both the double boiler and microwave method and personally prefer using a microwave because it is easier.
However, I recommend not getting ahead of yourself and throwing the whole block into the microwave for ten minutes. This is a sure-fire way of burning the base and once that happens it is ruined.
Step 3
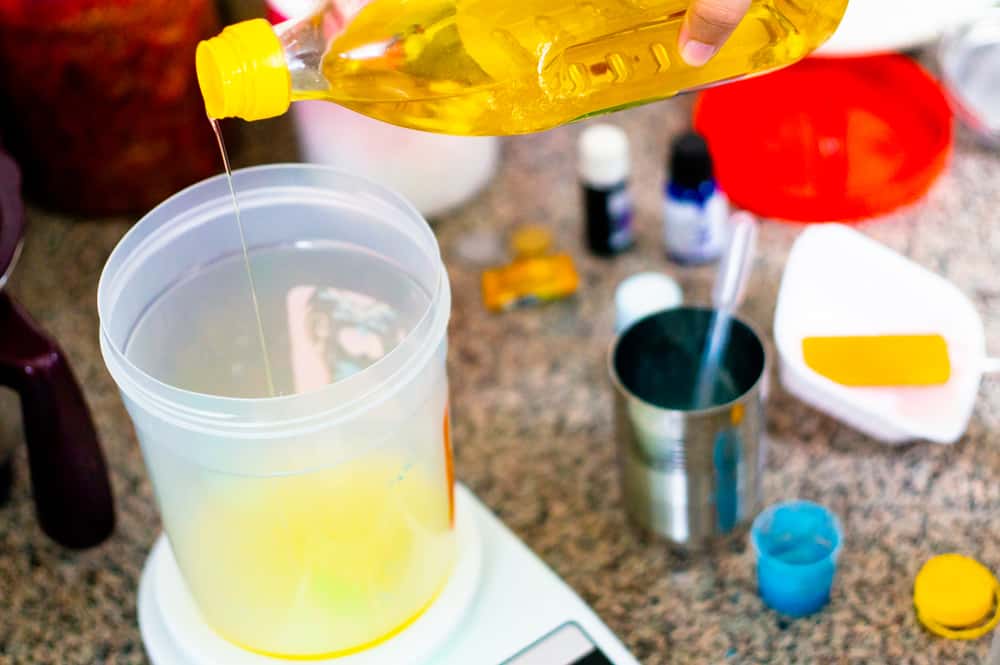
Once the cubes are melted, add the extra ingredients of your choice such as scents, essential oils, and coloring.
Step 4
Pour the mixture of melted soap base and ingredients into a mold.
Step 5
Allow the soap to cool and harden for at least forty-five minutes to one hour.
Step 6
Once the soap has cooled and hardened it can be removed from the mold and used!
Wrap Up
I hope that this article helped you to better understand the differences between popular soap-making methods. I do not think that any of the above methods are too difficult for anyone to pick up.
The hot and cold process certainly requires more time and a few safety precautions when handling lye, but they are the methods to use if you want to make everything from scratch. While the melt and pour method is an amazingly easy process that requires less of a time commitment and materials.
No matter which you choose you will end up with a new skill set and homemade soap that is healthier to use and unique.
Thanks for reading.
